Contents
Events
- Select the calendar to create and view events from the list of the user's calendars. Select Action > Events, The sharing calendar will appear. From here you can:
- Select Viewing of Calendar
- Browse Calendar
- Create Event
Change Calendar View
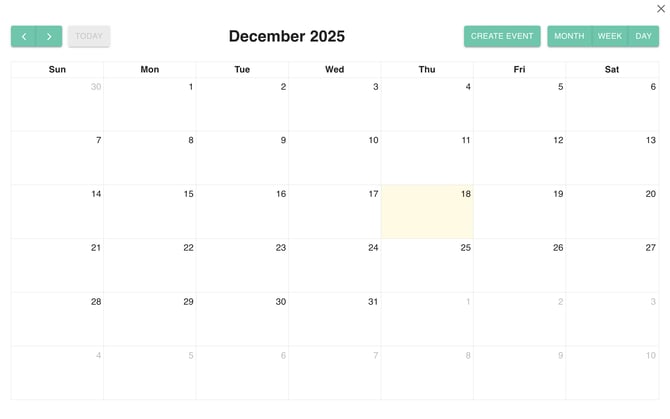
Provides users with flexibility to switch the calendar's display to show a high-level month view, a focused Week view, or a detailed Day view, depending on their scheduling needs.
- To change the level of detail, click the button labeled MONTH, WEEK, or DAY in the upper right corner.
- The calendar display immediately updates to show events and time slots for the selected period, allowing the user to switch between high-level planning and detailed scheduling.

Browse Calendar
Allows the user to navigate backward and forward through time using the directional arrows, enabling quick viewing of previous or future months, weeks, or days. The "TODAY" button provides a quick return to the current date.
- To move backward or forward in time (e.g., from December 2025 to November 2025 or January 2026), click the left arrow or right arrow next to the month name. Left part.
- To instantly return to the current date (today), click the TODAY button.
- The calendar view shifts one period (month, week, or day) backward or forward, or resets the view to the current date.

Create Event
Provides a dedicated button to initiate the process of adding a new appointment, meeting, or reminder to the calendar.
Option 1
To begin scheduling a new item, click the prominent CREATE EVENT button in the top right corner.
Option 2
Alternatively, a user can typically click directly on a desired time slot within the calendar grid (e.g., Wednesday, December 3rd, 2025) to start creating an event for that time.
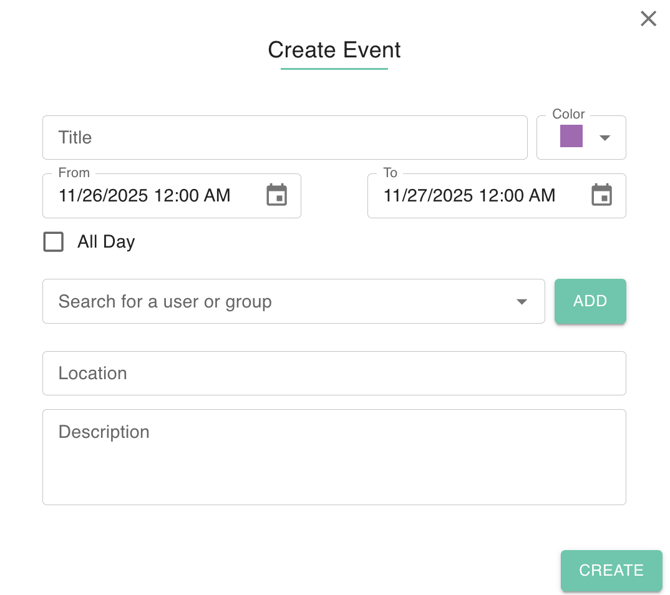
A pop-up window or new form opens, allowing the user to define a Title, set the specific start and end date/time using the "From" and "To" fields, and choose a Color for categorization.
Key functions include inviting attendees by searching for users or groups, setting a Location, adding a detailed Description, and applying an All Day setting if necessary. Once finalized, clicking CREATE posts the event to the calendar and sends invitations to all participants.