
Contents
Share Resource Calendar
Sharing Options
Change the Share Settings for Existing Shares
Remove Existing Shares
Add New Shares
Share Resource Calendar
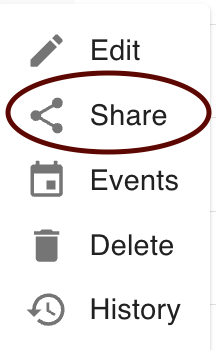
- Select the Resource calendar you'd like to Share from the list of the resource calendars.
- Click the action menu, Click on Share to open the share options.
- The sharing dialog popup will appear. From here you can:
- Change share settings for existing shares
- Remove existing shares
- Add new shares
Sharing Options
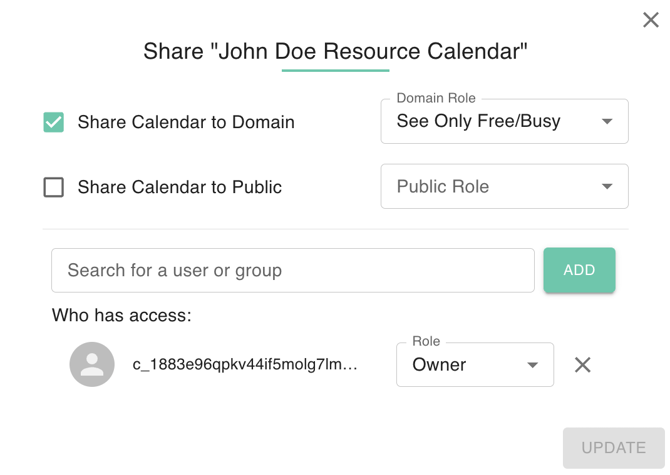
- Share calendar to domain: There are two options for visibility of a resource calendar within the domain. Either it is not shared to the domain or it is not. When a resource calendar is shared to the domain, any user within the domain can see/add the resource calendar.
- Share calendar to public: There are two options for visibility of a resource calendar to the public. Either it is not shared to the public or it is not. When a resource calendar is shared to the public, any user outside your domain can see/add the resource calendar.
- Permissions: You can choose which permissions the calendar has.
- See all event details: Users with the resource added can see all event details of any booked on the resource, even if they were not invited.
- See only free/busy (hide details): Users with this resource added can see events booked but not the details of them. It simply shows as "Busy" to those without an direct share or invite to the events.
- Share with specific people: This is where you can quickly share the resource calendar to a user or group.
Change the Share Settings for Existing Shares
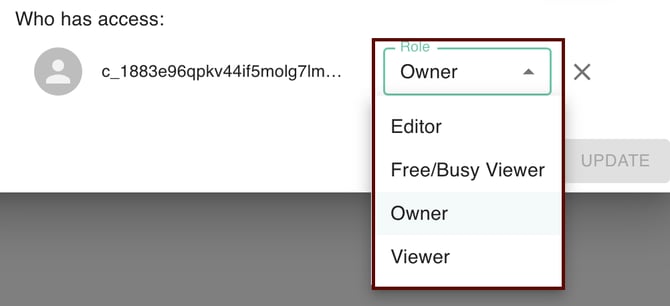
- In the Share Dialog box of the selected user, Click on the dropdown menu to the right of their name. Select the desired option from owner, editor, viewer, or free busy viewer.
- Click Update to save your changes.
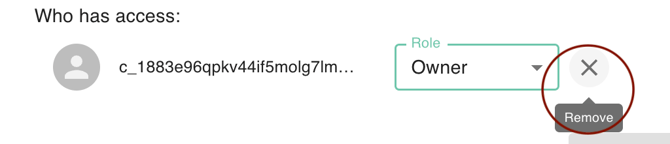
Remove existing shares
- In the Share Dialog box of the selected user, Click on the X next to their name.
- Click Save Changes to save your changes.
Add new shares
- Enter the email address(es) of the user(s) or group(s) that you would like to add to the calendar in the search of user or group field.
- Select the visibility you would like the new shares to have.
- Click Share & Save to save your changes.
