
Directory Sync is an automated tool available in gPanel used to synchronize user and group data from external identity sources directly into your Google Workspace directory.
1. Navigate to Directory > Contact Sync. Then, click Add in the top right corner.

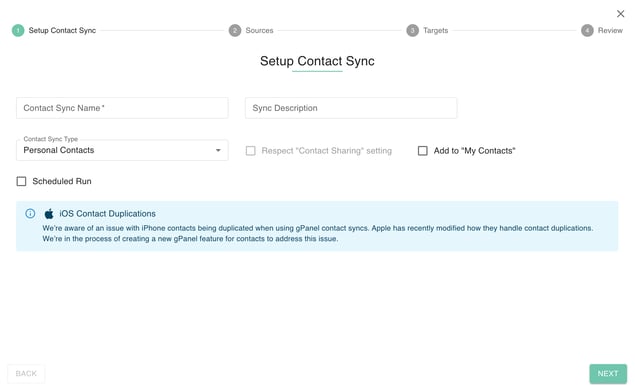
2. Enter the following information:
- Contact Sync Name: This name is what you will see listed in the contact sync menu of gPanel.
(Optional) Description: This is an optional field that allows you to add notes or description of the sync. - Sync Type: Select from
- Personal Contact
- Directory Contact
- Bi-Directional Contact
- (Optional) Respect "Contact Sharing" setting: If only directory contact is selected.
- Tag Label Name: Name of the label to be created for the contact sync.
- (Optional) Add to "My Contacts": This will add the contacts to both the target contact group and the target user's "My Contacts." (Note: If you are creating this sync for users that are using Outlook Sync with Google Workspace, you will need to enable this option.)
- Scheduled Run: This option allows you to choose if you want the directory sync to run every night. If you want to manually run the directory sync, leave it disabled.
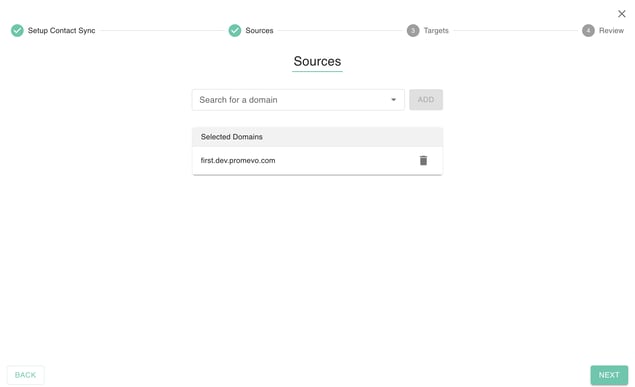
3. Now you need to select the source domain(s) that you wish to synchronize. A source domain is the domain whose set of directory contacts will be synced to the target users.
Click Next when you've added the source domain(s).
4. Now you need to select the destination users. These are the users who will be receiving the contacts from the sync. They will not be able to edit or change the contacts. Destination users can be added based on the following sources:
-
Email address
-
Group membership
-
Organization unit
-
Domain
Type the desired user, group, org unit, or domain in the search box and a list will appear. Click either Add All to add the entire list or Add Selected to pick and choose specific line items.
Click Next when you've added the target users.
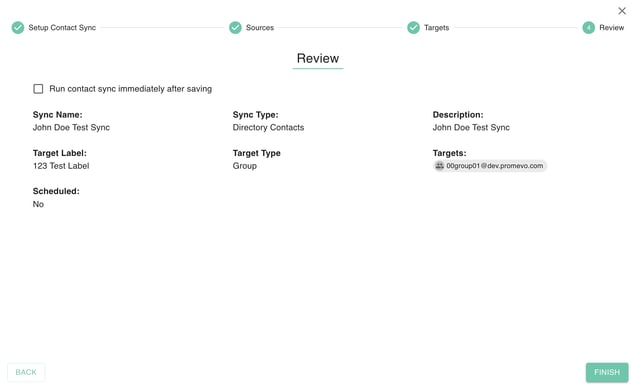
5. The final step allows you to review your configuration choices. Select whether you'd like to run the contact sync immediately after you save it. By default this will be set to yes.
6. After you're done reviewing, click Submit to create the contact sync.