
Contents
Drive Sweep is an automation tool that automatically transfers ownership of all files and subfolders within a specific Google Drive folder to a designated account.
This tool allows organizations to maintain centralized control by ensuring all documents in a specified folder are owned by a single account, mimicking the structure of a traditional file server.
Once a "sweep" is created, gPanel continuously monitors the location and automatically updates the ownership of any newly added files or subfolders every two hours.
Administrators can use this feature to streamline offboarding or project transitions by efficiently moving large volumes of data to managers or archive accounts without manual intervention.
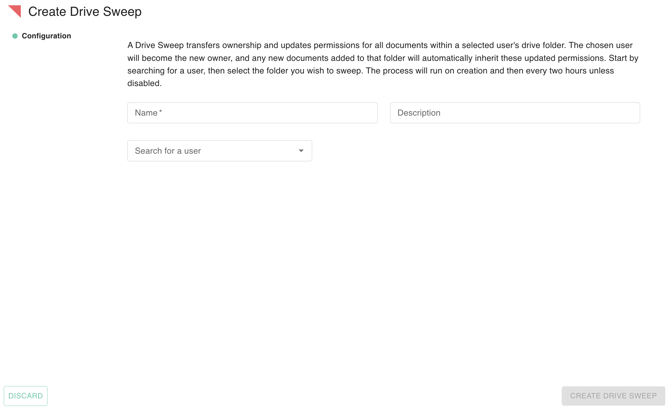
Create Drive Sweep
- Select ‘Create Drive Sweep’ Button on the top Right of the table.

2. Complete the configuration by entering a mandatory Name, providing a Description, and choosing the appropriate User.
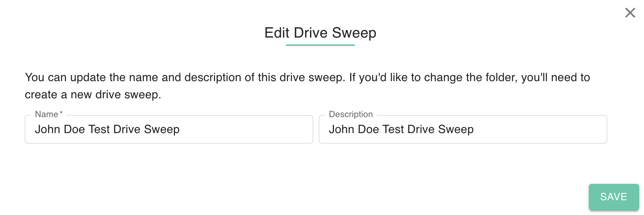
Edit Drive Sweep
- Locate the Drive Sweep Policy you wish to change and click the pencil (Edit) icon in the Actions column.
- Modify the necessary fields within the signature template configuration.
- Click ‘save’ to update the drive sweep policy. Note that if there is a [folder change you'll be needing to create a new drive sweep.
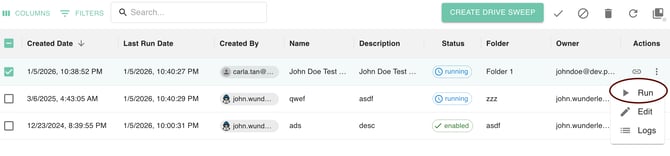
Run Drive Sweep
- Select the Drive Sweep you want to run.
- Select the Play button to manually run.
- The Status will change to “Running”
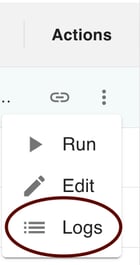
Logs
- Click the log icon under actions, and View the Run logs of the specific template.: Run Time, Successful Run, Job Status, Successful Documents, Errored Documents
Enable/Disable Drive Sweep
- Select a Drive Sweep from the list; by default, all new drive sweep policies are enabled. Use the check icon to enable a rule and the cross icon to disable it. Note that disabling a rule prevents it from running for any user and immediately stops all associated automated processes.

Delete
- Select the Drive Sweep you want to delete
- Select the trash icon button.
- Confirm Deletion.
