
Contents
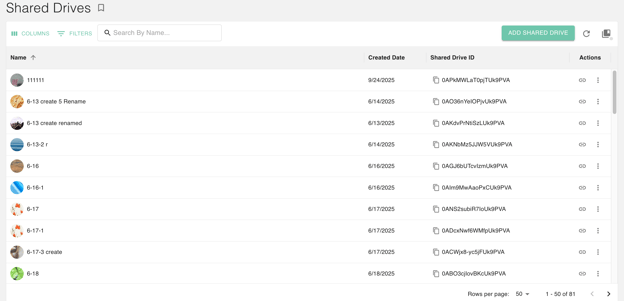
Shared Drives is a feature of gPanel that allows you to manage all of the Shared Drives across your Google Workspace domain, giving admins more control and visibility over their organization's data.
As an administrator, you can change the members and their access level for any Shared Drive in your domain. You can also add shared drives, change the sharing settings for a Shared Drive, and the default sharing settings for all new Shared Drives.
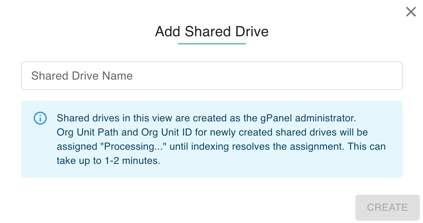
Add Shared Drive
- Click the Add Shared Drive Button
- Enter in the name of the new Shared drive and then click Submit.
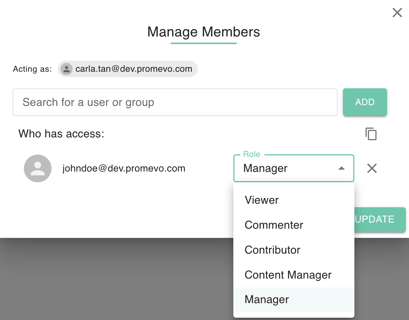
Share a Shared Drive
- Select the target Shared Drive.
- Go to Action and select Share.
- The Manage Members Dialog will open.
- In the dialog, you can add new users by selecting them.
- You can also edit the access levels of current members or remove people with existing access.
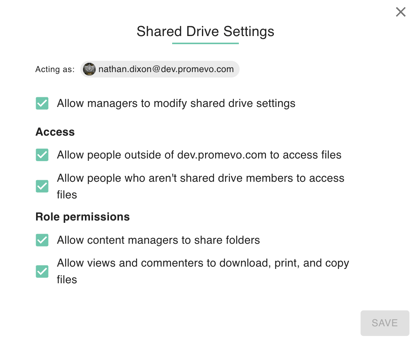
Edit Share Settings
- Select the target Shared Drive.
- Go to Action and select Settings.
- The Shared Drive Settings will open.
- In the dialog, you can check boxes for Access and Role Permissions
- Click Save once done.
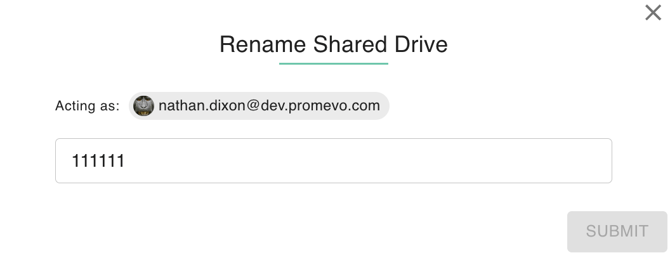
Rename a Drive/ Document / Folder
- Click action
- Click Rename , A dialog box with headers: Rename Shared Drive will appear.
- Supply a new name
- Click Submit
Delete a Shared Drive
- Select the target Shared Drive
- Go to Action and select Delete
- A confirmation modal will be prompt, select delete to continue.